Saturday, June 11, 2011

Now We Wait...

The kolache dough has once again climbed up into the mechanisms of my mixer. I have gotten it scraped out the best that I could, so hopefully the whole thing is not ruined.

The dough is now taking its first rest. Jon has been acting as Quality Control (QC) tasting here and there, making sure there are no more measurement goofs.

We have decided to try to utilize some of that extra yeast that got removed to make some of the Crusty Artisan Bread from last week. We have something like 6 loaves going right now. I know, we are crazy.

Here are some action shots of how things are going to whet your appetite.

Don't kill the whisk!

Don't kill my whole machine!

Off To A Rough Start

We are only 1.25 hours in and we have had one serious mishap and one heated argument. This is going to be a looooonnnnngggg day.

(Misread tablespoon for teaspoon and put 6 Tablespoons of yeast in instead of teaspoons. We fished a lot out and are hoping for the best.)

We are still adding flour at this point. More to come...

Friday, June 10, 2011

Preparation...I've Moved Up a Stage

Bring it you delightful confection...I'm ready.


I'm going to need some moral support here people! Let me hear it!


Kolache Intimidation, Contemplation, and Other Technical Difficulties

Back in the late 1970's and early 1980's,  James Prochaska and Carlo DiClemente developed The Stages of Change Model as a way to describe the process smokers go through in trying to quit. Why do I bring this up? While working to improve the blog for you guys, I made a realization: It has been over a year since I have attempted to make a batch of kolaches. A year since I have attempted to master what this blog's name was all about. It got me thinking. Why have I not tried to make these in so long? I have all these new gadgets to help, 3 pages of notes from my kolache lesson with a little old Czech lady, what am I missing? This is what has turned me back around to these stages of change. Many of you have probably heard of these stages, but here is a quick brief for the rest of you, and how they fit in relation to my problem behavior of avoiding making kolaches.

Stage I: Precontemplation (Not yet acknowledging that there is a problem behavior that needs to be changed.)
  • "Kolaches?! Who wants those things? No one. So what if I don't make them, get off my back, will ya?"
Stage 2: Contemplation (Acknowledging that there is a problem but not yet ready or sure of wanting to make a change.)
  • "Okay, so it's been a year since I've baked them, but you know, I'm busy and tired. I mean, we can always get them from the store when we visit Jon's parents if we needed some anyway."
Stage 3: Preparation/Determination (Getting ready to change)
  • "I think I really need to make some kolaches, lest I forget everything I learned during Kolache lesson 101....over a YEAR AGO!!! Holy Fishsticks, it's been that long!?!!

Stage 4: Action/Willpower (Changing the behavior)
  • I am going to make some kolaches! This very weekend!

Stage 5: Maintenance (Maintaining the behavior change)
  • Big family get together coming up! Time to make more kolaches!

Stage 6: Relapse (Returning to older behaviors and abandoning the new changes)
  • Screw this, I'm not baking anymore. Ever.
Now not everyone relapses, some people relapse and then re-enter the cycle. As far as I can tell, I'm sitting between Contemplation and Preparation, and here's why.

Kolaches are...well...my nemesis. They are not merely a pastry that can be whipped up in a batch of a dozen or so. They are usually made in batches of 6-10 dozen at a time. They are a labor of love that take an entire day of coddling to make perfectly. It is exhausting and your back is killing you by the time you are done making them. You also need a giant bowl to make them in, and I am concerned that I still don't own a bowl big enough to contain all the dough. Okay, you're right, I'm still making excuses. I have just had so many fails when it comes to kolaches that I don't know if I can stomach one more.

And let me tell you another thing, the good bakers don't write their recipes down. When I went to the Kolache Master's house, she told me to use 10 sifters full of flour. Not cups, no units, not spoonfuls. A sifter full is not a unit of measurement. Why 10 sifters full of flour? Because that was just how many would fit into her stand mixer. Well, what if my stand mixer is not as big as hers? Then what? The whole mess will be off then and I'd have another disaster on my hands like this, this, this, and let's not forget this.

Will I ever get this right?

I can't even get photograph them properly!


... *sigh* ...


What would Julia think if she heard this? She would be abhorred. "You have to be fearless!!!" she would chirp. She's right, you know. I could spend the rest of life being afraid of these things, or I could say, "What the hell!" and keep on trying. I'm still wavering between Contemplation and Preparation, but now I'm making plans to go purchase what I need: 10 lbs. of flour, 4 dozen eggs, a gallon of cream and 45 lbs of butter. Maybe if I can find my balls tomorrow I will get started, long as I am up by 4 a.m., I should have enough time to finish. Wish me luck.

Thursday, June 9, 2011

Rainbow Cupcakes or Tie Dye Cupcakes, You Decide

The Rainbow Cake has been such a big hit on the blog, Facebook, and the office that I've decided to make a shortcut version for y'all that don't have hours to build a 6 layer cake. This one I made in cupcake form, but you can translate it into a single layer or double layer cake if you choose. I made these for a company meeting we have to go to today, and was able to whip them out (with baking time) in a little over an hour. The ingredients are almost the same as the Rainbow Cake:

• 1 – Box of cake mix in vanilla, white, or French vanilla flavors. (The cake base has to be white so if you see another boxed variety that would normally produce a white cake on completion, by all means go for it and tell me how it works out for you.)

• Whatever ingredients your cake mix says it needs to be made (usually eggs, oil, and water.)

• Muffin cups

• Gel food coloring in blue, red, yellow minimum. Splurge for more colors as your budget allows. Gel works better than the cheap kind that you dye Easter eggs with. You will use less dye, and the colors will be more vibrant.

• 1-2 tubs of icing. I chose white butter cream, but you can pick any flavor.

• 1 - Muffin pan (I had two muffin tins from a previous debacle, so I was able to cook all my cupcakes at once.)

• 6 bowls and spoons to mixing the colors in. Cereal bowls work just fine.

First things first, you need to make your cake batter according to the box's instructions. When it is nicely mixed, separate it equally into your six bowls. You can measure if you have OCD, or you can eyeball it like I did.

Once your batter is separated, add each color dye to its appropriate bowl. If you forgot/don't know how to make certain colors, read the Rainbow Cake post linked above.

Batter up!

Add your muffin cups to the tins and preheat your oven.

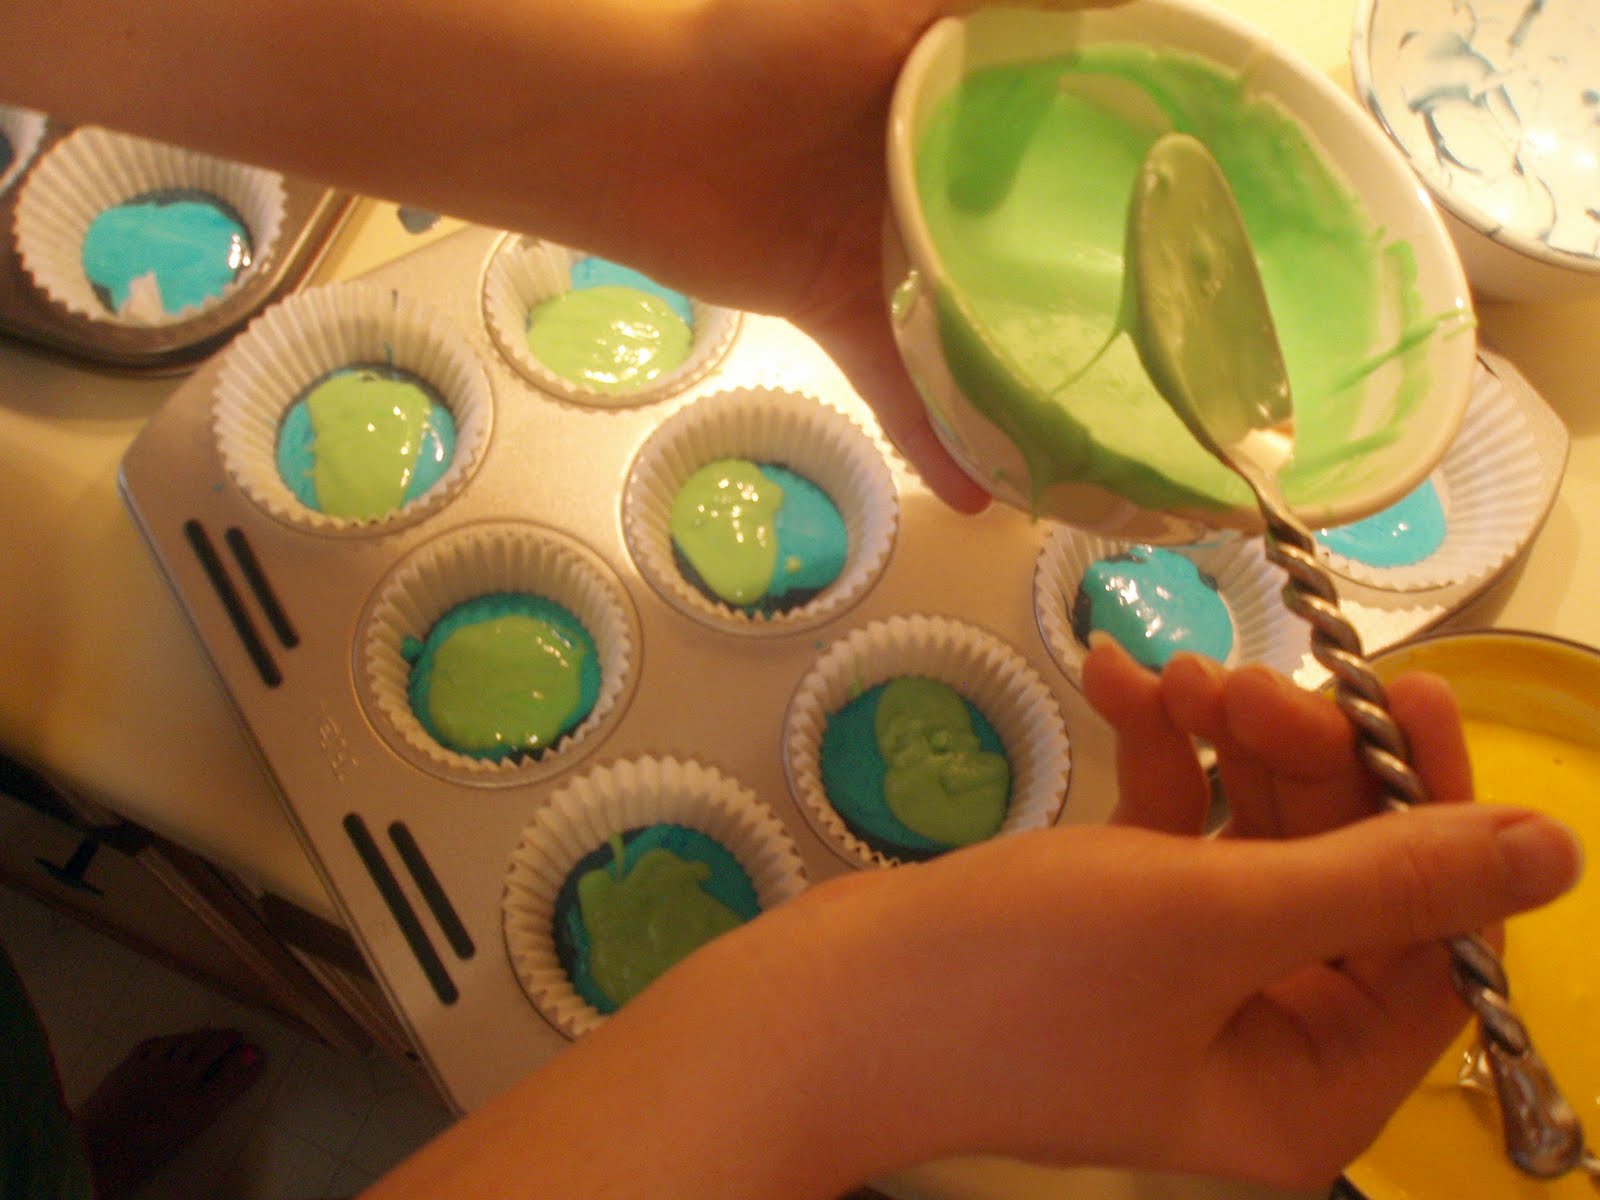
Now, we are going to add the colors. If you want red on the bottom, you will add the colors in this order: Red -> Orange -> Yellow -> Green -> Blue -> Purple.  If you want purple on the bottom, reverse that order. I put purple on the bottom because I added too much blue to mix and my purple came out ugly. Oh well.

Add a little of the first batter into the bottom of each cup. Just a spoonful or so. You only want the muffin cups 2/3rds of the way full once ALL the colors are added. Plus you may run out of particular batter color if you are overzealous like me. Only 21 of my 24 cupcakes got purple bottoms because I was too generous at the beginning. Start spooning in a small and add more after all 24 have a little of that first color.

If you want neater layers. Tap/shake the pan a couple of times between layers to help the batter settle flatter. You will also have to be more gentle when spooning in the layers so that the force of your plop doesn't send the newest color careening towards the bottom of the pan. If you want a more rainbow tie die effect, just plop and go, maybe just poke a toothpick in a few times. Don't over do it or they will all turn out 1 color. Now, if you are wanting those Polly Perfect rainbow layers, you might as well make the Rainbow cake. In the baking process, the cupcake layers will mix a little in odd ways and there is really no stopping it. Let your OCD rest for a day and let nature do its thing.

Continue to build up your layers in order. Remember, start with a little of the color in each cup and go back an add more if you have left overs at the end of each color round.


Purple, blue, green.

All 6 colors. Got a little short on orange as you can see.
Once you have all the colors in the cups, give the pan a firm tap or two to settle the batter in the pan. DO NOT under any circumstances try to swirl the colors with a knife or toothpick. This will blend the colors and you will end up with a bluish brown cupcake mess. If you wanted that, you should have just baked chocolate cupcakes. You can now bake the cupcakes as the box directs.


Weird blue dots on the left. Pretty nonetheless.
Wait until the cupcakes are completely cool before you ice them. Then they are ready to enjoy!

Little Cuties!
Tie dye on one hand, rainbow on the other. Delicious just the same.

Wednesday, June 8, 2011

Wednesday Wisdom From Julia

"The only real stumbling block is fear of failure. In cooking you've got to have a what-the-hell attitude."

True talk Julia, true talk.

Tuesday, June 7, 2011

Technique Tuesday: Making Roses from Gumdrops

Today, I'm going to show you how to make fancy gumdrop flowers to decorate a cake or cupcake with. Certainly, easier than an icing flower, these beauties have an extra sparkle that will add a bit of drama to a plain looking cake.

                                                               (c) Real Simple
 First things first, you will need the following:
  • A bag of gum drops. Each flower requires 3 gumdrops, so buy appropriate to your needs.
  • Sugar
  • Knife
  • Optional: rolling pin if you have one. If not, no big deal.
Sprinkle your work surface with a good bit of granulated sugar. Pull out your 3 gumdrops and use your rolling pin or the heel of your hand to smash to the gumdrop into a thin, 1/8" or so flatish disk. If it sticks to your hand or the pin, sprinkle more sugar on the drop.


Hulk Smash!
Next, you need to cut the disks in half, no big deal, don't freak out.

Aww..snap! Cut like a gansta!
Okay, the next part is kind of tricky so pay attention. Take your ugliest cutting and roll it up really tightly on itself. This will make the interior part of the bud. The heat of your hands will start to melt the drops a little, so sugar up as necessary. Pinch the bottom of the bud to secure the roll in place.

Use the remaining half-circles to continually wrap around the interior bud, pinching the bottoms together as you go. Try to overlap the seams so that they aren't all on the same side. It's not a lot of work and you get this really pretty little decoration.


Awwww

Just keep repeating the steps until you get as many as you need. Remember this is a garnish, so you don't have to make 900 of them, just a few for the center. They are very dense, everyone is not going to want to chew on one of these, probably only the kids. You want the cake to be the star, not the flowers.

Right before you are ready to put them on your cake you are going to need to cut the pinchy bit at the bottom off so that it will sit flat on your cake. We are going to chop that off.


Chop off the pinchy bit.
 Then you're ready to decorate with these little guys. Enjoy!

Sunday, June 5, 2011

Crusty Artisan Bread From Scratch - Embarrassingly Simple

I love recipes that give a huge wow factor. Recipes that are so awesome, that people would swear on their lives that you spent years as a baker's apprentice. Today, I found another one of those recipes and cranked out some old world artisan bread that would put Whole Foods to shame.


Here's how it went down.

Last night I was feeling a little low, and needed something constructive to do. I had accidentally left our bread machine at my mother's over Memorial Day weekend, and there has been no bread in the house ever since. Yea, I know, the horror. Shhhh it will all be okay. I had stumbled across a recipe for a no-knead bread several months ago, but those are always too good to be true.You usually end up with some kind of flat brick, or chewy grossness. So last night, I decided I would risk it and try the "No Knead Artisan Bread".

Here's what you need:
  • 1/4 tsp active dry yeast 
  • 1 1/2 cups warm water 
  • 3 cups flour, plus more for dusting. You may use white, whole wheat, or a combination. 
  • 1 1/2 tsp salt 
  • A 6 or 8 QT Dutch Oven type pot (cast iron), ceramic, or a oven safe Pyrex dish with a lid.
  • A non-terry cloth towel (flour sack towel) Where the heck you gonna find one of these?  Amazon, Wal-mart, some old lady's kitchen. Mine came from Target, 4 for like a $1.50. (you could probably get away without using the towel, but I didn't risk it since I had one.)
Okay, first things first. This recipe is one of those great start and leave it types. (Like a pot roast or crock pot meal). Come to think of it, it would also go great with either one of those meals, but I digress. This is not the bread you make when you want it with dinner in thirty minutes because your husband's boss is on his way over for dinner and you want to impress him because they are laying people off and you just can't go back to working that street corner...and oh GOD!!!! 

*ahem, clear throat*....sorry about that. *straightening my apron*

So, just keep that in mind, plan appropriately. Start this bread at night before, go to bed, and cook it with dinner the next day. 


Now don't flake out on me. I know you're thinking, "Oh God, I don't have time for that!" Yes you do, get your panties out of the wad and get back over here. I'm going to make it all okay. Chill out diva. You act like I let you down before.

...Okay, contain the snarky comments we are getting started...

Get your warm water and yeast in a large bowl, and mix it until it dissolves (your water will look cloudy brown). When I say warm, I don't mean scalding. Warm like milk for baby warm. Yeast is a living thing and if you plop down in scalding water, it will curse your name as it dies a painful, miserable death.  

Afterward, toss in your salt and flour. You hopefully have a stand mixer stirring this up, if not, get your husband or eldest son to strong arm it into a sticky, thoroughly congealed mess. Scrape down the sides of the bowl and cover tightly with plastic wrap. Keep in a warm place and let it sit anywhere from 8 to 18 hours. Mine rested in the kitchen from like 4pm to about noon the next day. You can go out and drink the night away and not even worry about the bread until you have slept off your hangover.

When you drag home from partying all night, and your ready to move on, take a look down at your bowl of bread goo. It should look something like this. 
 
No, this is not vom
Check out all the bubbles on the surface, that is how you know it is ready to go.

The next thing you are going to do is sprinkle a few tablespoons of flour onto a work surface. You are now going to turn the bread out. Now keep calm Myrtle. I know what you are thinking. We are not going to knead here. All you are going to do is turn the goo out of the bowl onto your floured surface, sprinkle some flour on top of that, and turn it over once or twice on itself. Now you are going to loosely cover the blob with some plastic wrap and take a 15 minute break. You deserve it champ. (The dough needs to rest from all your man handling). Check it out.
 Turn out dough


Okay, now that you are rested up from all that hard work, take off the plastic wrap and form the dough into a ball like a boss. Flour your hands if necessary to prevent it from sticking. 
 Form into a ball like a boss.
Now you are going to flour up your flour sack towel really well. Then gently place the dough ball on the towel.
Plop, but gently.

Whew, all this work, I'm going to need a drink and a nap. Loosely cover the ball with the edges of the towel and let it rise for the next 1 1/2 hours. It should double in size, that is why you don't want to wrap it up tight. Have yourself a celebratory Appletini, the hard work is over.
When the 1 1/2 hours have passed, drag your butt back to the kitchen, place the dutch oven and its lid in the oven, and crank up the stove to 450*. Don't even look at the bread. Set a timer for 30 minutes and go have another Appletini. 
After the thirty minutes have passed, it's time to get your bake on. Go gently unwrap the bread and stick two fingers in the middle. If the dough does not spring back readily, it has doubled.
"I'm Doubled! Quit Poking Me!
The next step is a little trick so pay attention, Myrtle. Take the dutch oven out of the oven, place it on top of the stove, and take the lid off. Then, you're going to slide your hands under the bread towel, and take it over to the dutch oven.

Scooping and taking

Then, flop the dough into the pot. Shake the pot 2 or 3 times to get it evenly distributed.


Flopped it in there anyway.
Now, put the lid on it and stick it back in the oven for 30 minutes. After those thirty minutes have passed, reach in and take the lid off. Cook it for another 15-30 minutes, depending on how dark you want the crust. When it's done, pull it out and dump it on a rack to cool. This is what you get.

Tada!

I'm Betty Freakin' Crocker!
 
If you like what you see, please Follow Me for more recipes and cooking related antics.


Wednesday, June 1, 2011

Going to Culinary School and Other Craziness I Have Been Entertaining

For almost ten years now I have wanted to get my PhD. Countless grad school applications (okay, only about 6 really), interviews, and rejections later, I am still chasing that dream...for now. However, since the Rainbow Cake, a little seed has been planted in my brain that has made me think that maybe I've chosen the wrong career path and should entertain culinary school.

Now let's not get delusional. One semi-fabulous cake a pastry chef does not make, but the joy of seeing someone savor a bite of my cakes in pure om nom ecstasy seriously gets me high. I mean check this out: I don't know if you remember the time I stole eggs from Bobby Flay, but it also involved this PhD lady I work with. As you may recall, this woman made it pretty clear throughout our interactions that it pains her to condescend to my level. Well, something amazing happened. After glancing upon the rainbow cake, she took some home to her rainbow-loving children. The next day, she spots me in the hallway, grabs my arm, and proceeds for the next 15 minutes to talk to me about how awesome it was and how it made her kid's entire day. Fifteen whole minutes! Now that might now seem like a big deal, but I've been doing some calculations and that is more time talking about the cake than she talked to me throughout all the rest of our interactions combined...including when she interviewed me for a position I didn't get. If that doesn't boost your self worth a little than maybe your self-esteem is more solid than mine.

Well, last night I was reading a magazine with cake recipes and tips and thinking, "I can do those." Now, I'm not talking about all that crazy wedding foolishness with writing and scrolling and whatnot. But things more like this:

I can pull these off...probably.
 My first thought was, "I'll make that for us with Sunday Supper." However, after reading the calorie counts on these bad boys, I started to weep. Some of the cakes pictured above have more than 850 calories PER SERVING and more than 50 grams of fat. I cried and vomited a little in my mouth with guilt as my stomached ached for cake. My scale has registered over the self-loathing number of 170 lbs., and I have been trying to cut back. Just one slice of these would put me way behind in the "I am not a lard-ass" department. This brings me back full circle to the skinny chef debate and trying to figure out how to circumvent this problem.

This is when I had a semi "aha!" moment. What if I made these cakes and sold them to little coffee shops around town? They aren't looking for cakes with words or fancy scrolling, but they are looking for decedent sweets to pair with their lattes. I tossed in bed for an hour last night wondering if I could really pull this off. Anxiety ate me up. I don't know if I would even be bold enough to ask these businesses if they would be willing to supplement their merch with my collection of confections. I swear, I have no balls. Even an imaginary rejection from a restaurateur makes me break out into a sweat. However, the supplemental income and happiness watching some skinny bitch snarf my 1000 calorie cake slice with her soy latte makes me seriously higher than a kite covered in methamphetamine.

A co-worker has a cousin that makes wedding cakes, and she has offered to let me come watch in a few weeks. I figured I will learn a few things and see if this is something I can see myself doing. Perhaps a few basic classes on frosting techniques will help me get those nice icing layers and flat cake tops I so desire. Then I will be in a more confident position.

What do you guys think? Doctorate or give the cakes a whirl?

If you like what you see, please Follow Me for more recipes and cooking related antics.


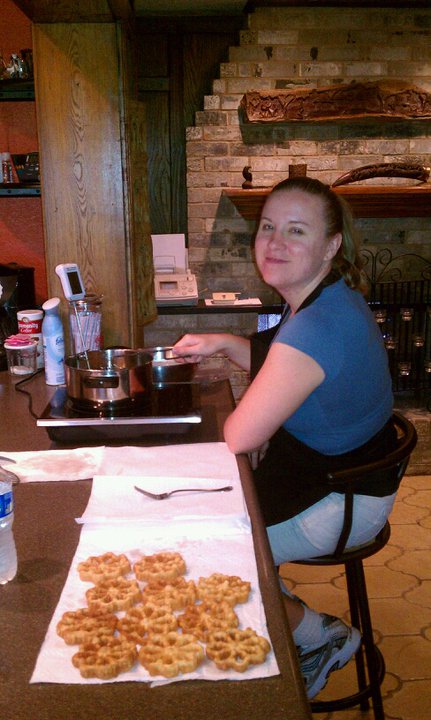
Rosettes on Memorial Day and Other Wordlessness

Batter Yield: About 1,000.