Thursday, June 30, 2011

Real Things Jon Says...

*We're sleeping around midnight*

Jon: Babe!
Me: Huh? Wha..what is it?
Jon: Are you baking something?
Me: Excuse me?
Jon: Are.You.Baking.Something?
Me: ummm...what?!
Jon: ARE YOU BAKING SOMETHING WOMAN!?
Me: *blank/slightly judgmental stare* ... um no. But now I have to ask, why?
Jon: I smell something...different.
Me: What the heck does that mean?
Jon: I just smell something different, okay.
Me: Go to sleep! >:-(
Jon: *incoherent grumble, snore*
Me: *lay awake for the next hour wondering WTH he is dreaming about/smelling*
 

Tuesday, June 28, 2011

Rearranging Your Kitchen For Efficency

I was thinking about adding this to the Food Budget Series, but decided against it since there is not a direct tied to saving money. This is more about efficiency. One of the big complaints I hear from people against cooking is that it just takes too long. I know we have covered some time saving tips in the series, but let’s step back and take a better look at logistics of our vessels. (Meaning pots and pans).

I went a little OCD on my kitchen this weekend after throwing my back out for the fourth time since Easter. When I moved into the apartment, we were getting wedding gifts willy nilly and I would just shove them into cabinets. I have had one great rearrange in the year at the apartment, but it was time for a revamp. Here’s how it went down.

First things first, I pulled everything out of the cabinets and created a fresh hell in the kitchen.

Random baking accouterments

The big appliances, shoved in haphazardly, ready to crush a foot.
This may sound silly, but the next thing I did was go buy those black gel pads for the floor. I hate shoes, and my philosophy about shoes falls in line with Dane Cook's. As a result, cooking hurts my knees and back BAD. The gel pads have helped tremendously in that department. They have even helped Jon's back pain when he is washing dishes. They are definitely worth the investment.
 
The next thing I should have done was throw out any tupperware that was warped, stained, or missing a lid. Also, throw out chipped or broken dishes since they harbor bacteria. Throw out or donate appliances and dishes you never use. I forgot this step. You shouldn't.
 
The next thing I did was think about what items I was using on a regular basis. You can do this as you are cooking. What items are you having to walk away from your stove for the most? Those are the items that should be moved closer. I decided to move those items from the lower to the upper cabinets, and from the left side of the stove to the right. The bending at the waist was killing my back so this would really help with that problem. Since I am right handed, moving those items to the right of the stove makes sense because that is the first place I reach. Now, I don't have to go all over the place to get what I need.
    
Before: dishes, random small appliances, measuring cups, vases, is that a funnel up there?!

After: Dishes scooted, and frequently used mixing bowls, baking items, measuring cups, & tupperware.

The next thing I did was tackle my baking area. I use my stand mixer on a pretty regular basis, but my spices, flour, sugar, etc. were so far removed from it, that I was spilling them all over the kitchen. Wasteful and messy.

Cooking spices stayed put. Sugars, candies, baking soda, cookie cutters, etc. moved.
Now came the pots and pans. Here was there original location next to the poorly organized spice cabinet.

Pots ready to fall on your head. Not easily accessible, they don't really fit in this cabinet left of the stove.
I moved all these pots to the cabinet where the miscellaneous large appliances were (see 2nd picture above). These are nice deep cabinets under the counter. I placed the pots in with the handles facing out, again to the right of the stove, so that I could just open the cabinet, reach for the handle, and pull out what I need. I put the lesser used pots further from the stove, with the every day pots closest to the stove. Didn't take an after photo, sorry.

For the less frequently used items, such as party servers, big corningware dishes, etc. I moved them to the left of the stove, where I would go to less frequently. The bulky appliances from above, like that fryer, pizza stone, cheese board, wok, griddle, etc. were all moved down below in never-use land.

No more digging for what I need!

Since everything is a spot that makes better logistical sense, I can cook faster, bend less, and make less mess. Now all I have to do is remember where that spot is and I'll be cooking in no time! No seriously, if you have had stuff in the same place for a long time, it will take a few days to get used to the new layout. However, things will click soon and you will be chugging along without a hitch. Remember, every kitchen is different, so arrange it in a way that works best for you. You'll know when it feels right because your cooking will have a natural flow. If it doesn't work, change again. Just remember to tell whoever puts up the dishes so that they aren't doubling their time trying to find where put away those pots!

Friday, June 24, 2011

Woman Please


I'll eat your challenges for breakfast!

posted from Bloggeroid

Panda Bread's Done!

Behold!!!!

Quirky Pandas


So reader who challenges me, I have one thing to say to you....


(Recipe for Panda Bread Here)

Panda Bread Rising


It's not looking so pretty.

Panda Bread Sucks

Things are not going so well. Stand by...

Get More Bang for Your Food Budget Buck Part IV: Augmenting Recipes in a Cost Effective Manner

Beef up your Main Courses with Veg
We hear it all the time on television, the Internet, and in the news: Americans consume far too few fruits and vegetables, while consuming way too much meat (particularly red meat). This problem contributes to a multitude of health problems ranging from obesity, heart problems, cancer, and ultimately, death. It’s not a pretty picture.


Aside from the health problems related to over consuming meat, the cost can be staggering. I was shopping for ground round (beef) the other day and it was $5 a pound. In Texas. Where there are more cows than people. I can't even imagine what they are paying in...say...New York. This got me thinking, how can I cut back on using meat without hearing this:


This is going to take a bit of ingenuity. I'm not a fan of "sneaky" cooking; I think it only leads to trouble. I know I'm not a mother yet, but I believe, in my heart, that open communication about food will lead your children into making better choices on their own. When you sneak in ingredients to familiar foods, the taste will be altered to some degree, kids will comment on how the food tastes "funny", and will feel manipulated when it comes out that you slipped spinach into their brownies or brussel sprouts into their macaroni and cheese. When you are upfront and honest with your family about trying something new, you may get initially rebuffed, but curiosity may get the best of them. I could go on heaps on my opinions regarding kids and food battles, but I am going to save that for another time. Let's get back on topic.

There are several recipes you can beef up with veg that are totally legitimate. (I've got to find another term for beefed up! LOL) I think pasta dishes really lend themselves to this because the sauces really permeate the vegetables, giving the impression that they are integral to the dish as opposed to competing with it. Some of my favorite vegetables to add to pasta dishes are squash, zucchini, and eggplant. Let's look at two plates of spaghetti below. Which looks more appetizing?


Option A
 

Option B

I'm going to hope you chose Option B. This choice is not only better for you, it uses less meat AND will be more filling because it contains a lot of vegetable fiber. Squash, Zucchini, and Eggplants have a very firm flesh that really lends itself being a meat substitute. In saucy recipes I usually dice it into small pieces and let it simmer in my tomato sauce while I attend to other parts of the meal. They absorb a lot of the tomato flavor and have a good toothy feel.

Let's tackle another one. A classic crowd pleaser for decades: Lasagna! When we think of lasagna, we typically think of 4 things: Tons of Meat, cheese, sauce, and pasta. Truth be told, ANYTHING can go in a lasagna. Lasagna simply means "to stack". This is a great meal to have kids help out with because they help by sprinkling in the ingredients that you have laid out. By helping to prepare the meal, they are more engaged, and will be more likely to consume what is made. When it comes to cooking mise en place very important, but for lasagna, it is wicked important. When putting a veg layer in, I generally use veg that is cut into thin disks. This helps the layers stay nice and flat. Alternate meat and veg layers and you will find that you need 1/2 the meat you normally do, but you have managed to put in 3-4 squash, zucchinis, or 1-2 eggplants. I've even used cucumbers once (by accident) and it gave the final taste a bright, summery flavor. Chopped spinach leaves can be dispersed sparingly throughout for a hint of color.

Let's do one more. Let's talk about some of those casserole type meals like Pot Pies. Whenever I am making my chicken pot pie, shepherd's pie, or soups/stews, I ALWAYS throw in more veg than recipes typically call for. For example, my beloved Julia's recipe for Beef Bourguignon (beef stew) calls for only 1 carrot. Honey, please. People are already expect there to be vegetables in these types of dishes, so why not add a little more? They add a color, brightness, and flavor. Adding an extra couple of carrots or 1/2 cup of peas while pulling out 1/4 lb of meat isn't going to throw off the balance of these meals. If you cooked every single day, in one week you would have saved almost 2 lbs. of meat. At the rate that I listed above, that's almost $10.

What other recipes could you (legitimately) beef up with veg? Let me hear your ideas!


Are you making any changes you that you have read about? What did you do, how much did you save, and what did you learn? Tell me about it in the comments!

Thursday, June 23, 2011

Get More Bang for Your Food Budget Buck Series Part III: Turning Cheap Cuts of Meat Into Stellar Meals.

The Art of Braising

Meat is usually the most important expensive part of an entire meal. However, you don't have to live off ground chuck and bulk boneless, skinless chicken breasts to save a few bucks on meat. We've already talked about turning your single chicken breast piece into 2 portions by making cutlets, but we can do better. Let's talk a little about braising.

Braising is a fancy term that basically means cooking a piece of meat at a low temperature for a long period of time. (Low and Slow). Braising is not the technique you want to use when you are trying to whip out dinner in thirty minutes. However, if you are going to be working around the house all day, say on a weekend, putting a hunk of meat in the oven to braise all day will result in an awesome meal by dinner time. What's also cool as this big effort will likely produce leftovers you can eat on a couple days, or freeze for another time. You also don't have to constantly be checking on these meals. Check on them every hour or two only! Here's the low down.

Braising was developed as a method for cooking cheap, otherwise unpalatable cuts of meat. Some cuts of meat that are commonly braised are roasts, briskets, pork butt (which is really the shoulder by the way), stews, dark meats on birds, or meats that have lots of connective tissue. These meats are tough because they are big muscles that the animal uses a lot. Think of a man with 6 pack abs, if you punched it really hard, it would be really tough. Same concept. 

So how does braising work? Think of braising as similar to a hot sauna. When you first walk in you are totally shocked by the heat and you tense all up, but after awhile your muscles relax and you just turn to putty. That's basically braising.

So what special tools do you need to braise? Truth be told, you don't need any fancy equipment to braise; however, there are a variety of ways to do it if you do have gadgets gathering dust. You can braise in a cast iron dutch oven, corning ware (ceramic dishes), earthen ware pots with lids, and a crock pot. Lost the lid? We can work with that, too.

Okay, I am not going to do any specific recipes for this post. Don't be scared though, I will provide you with the basic steps that will get you through any braising process.

10 Steps for Braising:
1.  Don't even THINK about doing this technique if you only have an hour to cook. Just a friendly reminder.

2.  Season the meat with a dry spice combo that you enjoy. Don't know much about spices? Use salt and pepper. Cover the whole dang thing really well.

3. Heat a few tablespoons of oil or butter in a heavy pan or your Dutch oven.

4. Sear your meat in the pan on medium-high heat until the meat browns on the outside only. Make sure to brown all sides. DO NOT freak out if it sticks a little. That crusty crud is important for later!

5. After your meat is seared, move it in your braising pot or crock pot. If you seared it in your dutch oven, disregard this step.

6. This sounds fancy but don't panic! You are going to deglace the pan. WTH does that mean? You are simply going to get the crusty crud off the bottom of the pan by pouring broth, beef stock, wine, water, or juice and scraping with a spatula. Why? Because brown food is delicious and that crust = flavor, flavor, flavor.

7. If you notice a bunch of oil floating to the top, don't worry, we can skim that off later. Pour the liquid and crusty bits into your braising pot, careful not to rinse off all your meat's seasonings.

8. Add a cooking liquid (water, stock, wine, juice or some combination) to the half-way point of the main ingredient.

9. Add some chunky cut, aromatic veggies to the pot. Perhaps an 1-2 quartered onions and 3-4 rough cut celery stalks. Cover and place the meat on the middle of a rack in an oven that has been pre-heated to 200-300 degrees Fahrenheit. Lost the lid to that pot? Simply wrap the top tightly with foil. Remember, we want a sauna!

10. Cook until completely tender. This can range from 1 hour to 6 hours, depending on the type of meat you are using. Check on the meal every hour or two. If the liquid has boiled out, turn down the heat and add more. It will be tough and dry without the liquid. Feel free to spoon some liquid over the top of the meat when you check it, just for fun. Beef takes the longest to cook, followed by pork, then birds.

Here are 2 braised meals I made one day Chopped style because I was at Jon's parents. (Chopped contestants have to plan and cook an meal with the basket of mystery ingredients). The meal fed 13 people for only $30. The sides were rice and mashed potatoes. In The bulk of the cost was 10 chicken thighs with legs. The remaining was for the celery and a sack of potatoes. Everything else, I thought on my feet and pulled from their pantry. No recipes, just thinking on my feet. Total cost per person: Less than $3.

Seasoned with rosemary, salt, pepper, and butter, seared in butter, and braised at 300 with celery carrots and onion. Covered with foil. Total cook time: 2 hours. Results: A rich buttery flavor and velvety texture.

Seasoned with salt, pepper, and brown sugar. Seared in olive oil. Covered with onion, BBQ Sauce and Bacon bits!!!! Braised at 3oo degrees covered in foil. Total cook time 2 hours. Result: A sweet and salty BBQ flavor, tender and moist.

Wednesday, June 22, 2011

A Bread Challenge and Other Taunts

A reader just wrote in: "Now that you've mastered Rainbow Cake, are you Woman enough to take on Panda Bread?!"

Panda Bread


I have 2 words for you loyal reader....


Wednesday Wisdom From Julia

"The best way to execute French cooking is to get good and loaded and whack the hell out of a chicken."

The Original Drunken Chef

Monday, June 20, 2011

Get More Bang for Your Food Budget Buck Part II: Menu Planning and Plan Ahead Prep

If you are like most of Americans, you rush home after work and have about 10 seconds of private bathroom time before the kids are banging on the door screaming “What’s for dinner!?” Again, like the majority of us, you draw a blank. You open your fridge and see a hodge podge of ingredients and think, “What can I make with that?” Have no fear; we are going to turn a little bit of this in that into a few staple meals. Let’s get crackin’!


Let’s start with a little planning. Remember the notepad from your fast food favorites list? Pull that sucker out. Turn it to a clean page and gather the family around the table. Ask everyone at the table if they could choose dinner tonight, what would they want to eat? I’m going to give you 5 days worth of dinners that you can make on the spot if you plan and prep ahead just a little. This will help you when you are going to the grocery store, because you know what you are going to cook for the week and you can stick to a list of those items. This cuts back on wasted food, time searching for items, and impulse shopping. Let’s see some common favorites:

• Spaghetti and Meat Sauce

• Tacos/Fajitas

• Meatloaf

• Chicken (strips/nuggets/breasts)

Chicken Pot Pie

Believe it or not, you can crank most of these meals out in about 30 minutes if you plan ahead and have the prep work knocked out ahead of time. When you think about how these meals are more similar than different:


Okay now. You’re probably still freaking out about this, but now let’s talk about prepping these meals in advance so that all you have to do is throw the ingredients together and go.

Let’s start with the meat. As you can see from the diagram, we have six of the meals where half require ground meat (beef or turkey) and the other half requires chicken breasts. When you go to the store, buy a big container of ground beef and a bag of frozen chicken breasts. You will need ½ to ¾ of a pound of ground meat per person, per meal and 1/2 to 1 whole chicken breast piece per person. You will also need sandwich or quart size Ziploc bags. I do all my shopping on Saturday, and do all my prep when I get home. If I were going to make those 6 meals this week, here is how I would begin the prep:

1. Plan Which Day to Cook What Meal: Select which day I want to have each meal and write it on a notepad on the fridge. Mondays are my busy day, so I pick the meal that is quickest to prepare (spaghetti). I don’t like eating beef three days in a row, so I decide I’m going to have beef meal alternated with chicken meals. That way everyone know which dinner is coming up.

2. Prepping Bulk Ground Meat: I crack open my beef and I put enough meat per person for one meal in each bag. For our household of 2, we put in 1 lb or a good fistful approximation of ground beef per bag. Push the meat flat in the bag so it stacks nicely, and thaws quickly after being removed from freezer. When you have divided up all your beef, you will know how many meals you can get out of it. We have found that we actually use a lot less meat this way. $$$!

3. Prepping Bulk Chicken Breasts: Next, go after the chicken. Decide how you want to prepare your chicken. The pot pie and chicken nuggets require smaller pieces, so I cube up the chicken into small pieces, putting those in a bag. Some chicken breasts are mutant large and you can get away with making two cutlets out of them. To make a cutlet, cut the breast in half lengthwise, then mash it a little flatter with your palm. Put a cutlet for each person needing a meal, per bag. Cutlets are how restaurants get their chicken breasts to go farther. Chicken Parmesan, Chicken Fried Chicken, Chicken Teriyaki, etc. are all made with chicken cutlets. Tacos/Fajitas/ Chicken strips will require you to cut your chicken into strips. Cut accordingly.

Cutting a breast lengthwise will make two cutlets
4. Freezer Organization: If you have extra plastic baskets laying around, consider labeling them as beef or chicken, etc. so your mini bags of meat are quickly identified in their buckets. It will help keep all your bags organized, give you a good visual about how much meat you have left, and can help little ones who want (need to) help identify different types of meat. Example: beef is in a red bucket, chicken is in white. "Jenny, open the freezer and pull out one bag from white bucket and put it in the fridge for mommy."

(c) Jem from Dog Food Forum
An alternative approach care of "Crazy Cake Lady"


Now let’s talk a little about prepping veg. Most meals require some aromatics. What is an aromatic? A vegetable used as a flavor base for cooking, usually by sweating or sautéeing. Carrots, onions, garlic, peppers, and celery are all aromatics. All the meals we listed will require aromatics in different sizes. I like to buy garlic that is pre-diced in a jar, but all the rest I will cut myself. Guess what, they rarely go bad because I only pull out what I intend to use right away. Yes, you can buy pre-diced onions, celery, carrots, etc. If you are in a big time crunch and don't mind spending the extra money go for it and buy the pre-chopped stuff. You can save a lot more by doing it yourself though. If you feel more comfortable starting out with the pre-cut stuff and then moving to chopping yourself, it's a good baby step to getting started cooking at home. No judgment.

Onions are a must for all these meals, whether in sliced or diced forms. Sliced onions are the kinds you use for fajitas where diced is the small little cubes. Now because there are plenty of videos on how to dice an onion, and because I am not yet a domestic goddess when it comes to dicing, I am just going to refer you here to watch a video on how to do it here. This takes practice, but you will get faster each time you do it. It's important to take your time and make uniformish pieces so that they will cook at the same rate. I put the diced onion in a Ziploc and slap in the freezer. It will quickly thaw so defrosting is no biggie. (Feel free to make a sliced onion and bell pepper medley bag for tacos/fajitas if that suits your fancy.) Chop some celery into smaller, bite sized pieces and bag. Ditto with the carrots.

The hard work is done now. All your big prep for each meal is ready to go when you are. So let's talk about the next step we delayed earlier: Getting your family involved! Rituals, rituals, rituals.

1. First Person Home Pulls Out the Meat: Starting when I was about 8 years old, my mom would call me after when my school bus arrived home and asked me to pull out a package of whatever meat was on the menu for that night. The first person home checks the week's menu on the fridge, and pulls out one bag of meat that is required for that meal. Put the whole bag on a plate to thaw on the counter, out of sunlight. Because you have prepped all these little bags, it will defrost faster than the whole big container, and you will only use what you need. No kids to do this step? Before you go to bed, check the menu the night before, and place that meat in the fridge to defrost. It will be waiting for you when you get home.

2. Mise en place: What the heck does that mean!? Mise en place is simply French for "everything in place". Since you already know what meal you are going to cook because you have it all right there on the fridge, you have all your ingredients put together on your counter ready to go before you start cooking. This is a great step to do with kids 6 and up. Ask them what they think goes in spaghetti, what do they need? Have them go to the pantry and fridge to pull those out.

3. Starches take the longest to cook, start them first: How many times have you started a meal, only for one part of it to be getting cold while the rest is still cooking. It's a common problem, I still do it myself. The thing to remember is that starches like potatoes, biscuits, etc. take the longest and should be started first, followed by your meats, and your veg last.

Mise en place for lemonade syrup.
With these simple steps, the time it takes to make dinner will be cut back significantly. You'll be proud of your results when you see a week's worth a meal prep ready to go for the next week. As children get older, they can start taking on more tasks in the cooking department until they are cooking a meal a week independently. This is an important life skill that will help build confidence and self esteem. Good luck!


Are you making any changes you that you have read about? What did you do, how much did you save, and what did you learn? Tell me about it in the comments!


Next in the “Get More Bang for Your Food Budget Buck” Series: The Art of Braising, Turning Cheap Cuts of Meats Into Stellar Meals With Very Little Effort.

Thursday, June 16, 2011

Get More Bang for Your Food Budget Buck: Scaling Back Take Out, a Few Cents at a Time

Think about what you buy the most frequently when going out to eat.


Most people spend way too much of their food AND entertainment budgets on going out to eat. Yes, eating out is fast, convenient and a fun way to get your grub on from time to time. However, but it also can be expensive, over-portioned and unhealthy. Let’s not also forget the loss of sharing a meal together as a family. Snarfing down McDonalds in the SUV during rush hour is not considered a sharing a family meal.

There are boo-koos of data that suggest that families who share meals together even a few times a week are healthier not just physically, but mentally as well. Children learn important messages about food choices and preparation, in addition to culture and family values around the family table.

According to multiple studies conducted by Marla Eisenberg and crew at the Center for Adolescent Health and Development, it was found that children and teens that share family meals are less likely to have problem behaviors, eating disorders, low self esteem, and risk-taking behaviors such as smoking, drug use, and suicidal actions. There is even evidence that shows family meals will delay the onset of sexual behaviors in teens. All of these have long ranging socio-economic impacts. Who knew that sitting around the table just a few times a week could have such a big impact!?! So let’s get started on the track to pulling away from the drive thru and parking it the dining room. Your kids and your pocket book will thank you…probably the pocket book before the kids, but they’ll come around, eventually. ;-)

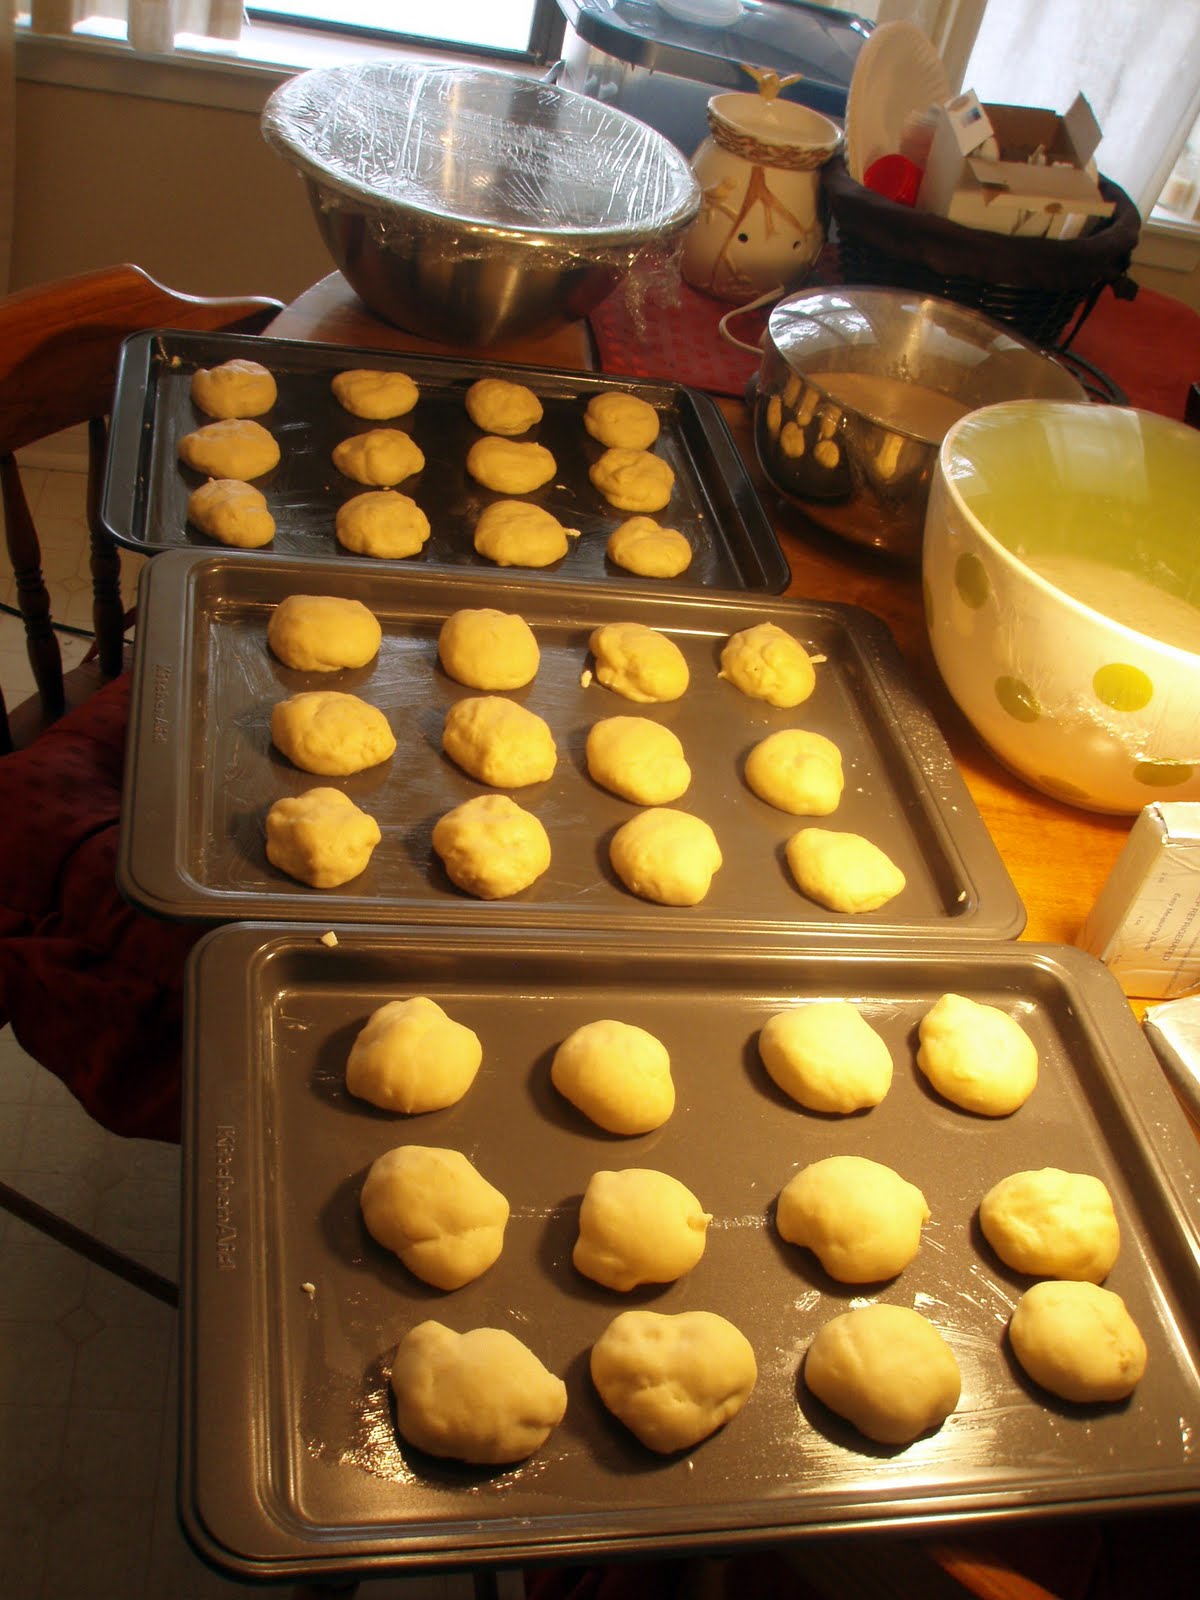
First things first, sit down with a notepad and a pen and write down the food your family eats out the most. The items on your list are the first items that you need to start learning to prepare at home. Of course, whatever you learn to make at home is never going to taste exactly like the store bought kind. However, you might be pleasantly surprised, once you get the hang of making it, that your version tastes better or is more satisfying. In the end, remember you will be much happier when you have more green in the bank than you will from the short-lived pleasure derived from a fast, store bought meal.

Now let’s be realistic. Everyone knows they can just stop buying fast food and eat at home. You can get that advice at any website you Google. I am going to be a little more realistic here because changing a habit like this can be tough. So, let’s get started.

First things first, look for items that can be purchased as a whole unit at the grocery store and prepared at home. The easiest example is pizza. My husband and I ordered pizza out nearly every single Friday. This would cost us anywhere from $10-$15 after delivery fee and tip each week. Now, we buy several week’s worth of the good quality, frozen pizzas at the grocery store that are between $5 and $6 a piece. Our savings are around $16-$20 a month. Doesn’t sound like much, but that is almost $250 a year. That’s a car payment. Not only are we saving that money, the frozen pizza cooks faster than the time it took for the delivery guy to get our order to us. Yes! If you just can’t give up your favorite chain pizza, consider picking it up instead of having it delivered. If it is on the way home from the office or near where you pick your kids up from school/practice, you can save yourself several dollars in deliver fees and tips. This step can be a bridge to the cooking at home step.

Let’s look at more “meal-like” store bought foods. One frequent fast meal is a bucket of fried chicken with all the fixin’s. You’re trying to give your family a real “sit down” meal, but you don’t have time to fry a whole chicken, let alone make sides, rolls, and dessert. That’s okay; we can work on this, too. Consider buying only the main course (i.e. the bucket of chicken) and supplement it by making the sides at home. Mashed potatoes will take around 20 minutes, and you can pop open a can of veggies (or use frozen) and have the sides in no time. There are also frozen, bagged biscuits or biscuits in the can that you can make instead, saving even more money. We were a KFC family, so I am going to pick on them a bit. KFC’s sides $2.50 each. Two cans of veggies cost less than one prepared KFC side! All that you would have to do is open the can/bag, pour into a bowl, pop in the microwave, and serve. Prepared foods are almost always going to be more costly that unprepared foods. In addition, they are going to contain more unpleasant things like fat, trans fat, oil, MSG, salt, preservatives, etc. than your home cooked varieties. Not to mention, they will taste less fresh. Who knows how long those mashed potatoes have been sitting under that warmer…and how many hands have been messing with them?

Let’s do one more. How about sub sandwiches? You go to the deli with the kids, Jenny wants a bologna, Timmy wants a ham, Dad wants roast beef, and you want a turkey. Instead of buying everyone a sub, consider having a “build your own sub” night at home. Chain grocers are have a larger selection of breads that are more sub like than your boring old sliced variety, and lunch meats are pretty reasonable. For example, I know Wal-mart sells Bolillos, which are about the size of a 6” sub, 4 for $1. That’s already cheaper than one store bought sub sandwich. Now, I’m not going to lie, buying 3-4 varieties of lunch meat with 1-2 blocks of cheese at once is going to be a bigger upfront cost, but there will be so much more meat/cheese that you will be able to make quite a few sandwiches over the long haul for less. Pick one bag of chips for this week, rotating among family favorites each time. Or, you can buy variety packs so everyone has a single size of their favorite type. This is a great meal for kids because it gives them choices and control over their food. Get a large platter and put a several choices of meats, cheese, and veg (lettuce/tomato/pickle etc.) on it. Bring out a few bottles of spreads, mayo, mustards, ketchup, and some unusuals for a more grown up taste: pesto, vinaigrettes, salsa, bbq sauce. Give everybody their bun and let them go to town, experimenting with new flavors (or sticking with their favorites.) There are no wrong combinations as long as everyone is eating, in my opinion anyway. As a kid, my brother would eat a mayo, bologna, cheese, and applesauce sandwich pretty regularly. The fun was that we ate together as a family, and laughed at each other’s wacky combinations. My favorite was a PBJ with Cheetos (in the sandwich) dipped in milk. To this day, still one of my favorites. This can be a weekly ritual: Wacky Sandwich Wednesday. Eating at home is all about building a meaningful ritual, no matter how small. Things to stay away from:

Don’t Offer Too Many Choices: Kids, especially younger ones, don’t need a huge selection of 50 meats, cheeses and dressings. Start initially with flavors they are comfortable with and then substitute in more exotic choices once the ritual is established. Three meats, 1 cheese, 3 spreads and veg are more than enough choices for little ones.

Buy Blocks of Cheese, Not Pre-sliced Cheeses: Remember, the more processed the final product, the more it will cost. You can buy a large block, slice it all at once, freeze what you can’t eat in a reasonable amount of time, pulling out the amounts you will use as needed.

Meats: Pay attention to weights and packaging. A bigger package does not necessarily mean more meat. The more packaging usually means higher costs. Sometimes you can catch the sales on meats/cheese and make out like a bandit. Sometimes, the deli department overbuys, or have small packages they mark down to finish off a hunk in order to open a new one. (Kind of like scraps at fabric store). Fresh cut stuff will need to be eaten more quickly, but if you are at the store tonight, see meat on sale that will need to be eaten by the end of the week, and sandwich night is tomorrow…get it! Same is true for breads and deli rolls.

Rules: Making wacky sandwiches can be fun, but lay down one rule before you start and make sure everyone (meaning the kids) can repeat it and understand: “We want everyone to have fun tonight but there is one rule: You are free to make your wacky sandwich, but you must eat whatever you make.” Like I said before, my bro at the mayo, bologna, cheese, and applesauce sandwich. If your little one wants to make that, but you already know they hate applesauce, remind them of that and the consequences of having to finish their entire sandwich if they don’t like a particular topping.


Are you making any changes you that you have read about? What did you do, how much did you save, and what did you learn? Tell me about it in the comments!


Next in the “Get More Bang for Your Food Budget Buck” Series: Menu Planning and Plan Ahead Prep


Wednesday, June 15, 2011

Tuesday, June 14, 2011

Get More Bang for Your Food Budget Buck Series

After talking with some friends over lunch the past few days, I've decided to write a series of posts about getting a handle on your food expenses. Based on conversations with readers, I've developed a list that will take us down the road to shrinking your food expenses, reducing wasted food, developing new skills, and basic cooking skills to get even the most inept cook started. I will hopefully get the firsts posts up in a couple of days. Feel free to add your own suggestions and questions to cover. They may very well be added on to the series!

Bon Appetit!

Kolache Lessons, What the Latest Batch Has Taught Me

I'm sure quite a few of you out there are wondering when I am going to post the recipe for the kolaches I made last weekend. I don't want to break your hearts, but I am not going to post it. Why you ask? I don't like putting recipes out there without making sure that I can give clear directions on how to work the recipe properly, and right now I don't feel I would be doing you guys justice by just throwing ingredients out there willy nilly. After all, I want y'all to have successes, and leave the fails to me.


No sad muffins on my watch!

So here are some future plans in relation to said kolaches. First things first, I am back in Relapse, so it may be a little while before I attempt them again. However, it will not be one year. I promise. I mean it this time.

I have also decided that I have enough handle on the mixing of the dough components that I feel confident in halving the recipe into a reasonable amount. Three dozen kolaches is more than enough for one sitting. This will hopefully make my relapse period shorter and more manageable.

Please stand by and I crawl back on the wagon...if I can even find it.

Technique Tuesday: How to Separate Egg Yolks From the Whites

Lots of recipes like meringues, custards, or egg white omelets require you separate eggs for either the yolks or the whites. Some places will try to sell you a fancy gadget for this, but don't waste your money. Here's how to do it for free, where the only clean up is washing your hands.

Monday, June 13, 2011

A Foolish Purchase: What Cooking 6 Dozen Kolaches Will Make You Do

To escape the havoc that was the kolache making this Saturday, Jon and I decided to go to a local church bazaar and auction. We bid on a number of things, and we often bid things up so the church gets a bigger donation. Jon has had his fair share of getting stuck with things that he thought someone else would out bid him on. His worst to date was an electric organ. Neither of us play, so it sat in the middle of the living room for over a year. We finally donated back to the auction after I told him I was not moving it to yet another new apartment.

This year it was my turn. The more you bid, the more free drink tickets you get. I had my fair share of drink tickets, and the bidding induced hilarity that ensued after I downed a few cold ones. I only tried to bid on practical things, like food, gasoline, and the such. However, towards the end of the auction, they were trying to blow out some of the carnival food. I had been listening to how people were bidding up some over the other food items, so I got myself in a game of chicken...and lost.

I am now the proud owner of 25 sausages on a stick. I'm looking for ideas of how to utilize them. Of course we have just plain sausage with sides, or in "hot dog" form. I am also going to make a pot of beans. Can y'all give me any of your sausage meal ideas?

Saturday, June 11, 2011

Exhaustion Has Taken Over, I May Relapse

I'm dead and broken

Vote on the First Batch


Okay, so they are definitely the best batch I have ever made. However, the bottoms are crunchy and they shouldn't be. We have explored a couple ideas, and we have come to two conclusions:

  1. I buttered the pans to prevent them from sticking. I can't remember if my teacher had or not. We think that the butter might have sort of fried the bottom of the buns. Next batch we are not buttering and hope they don't stick.
  2. The kolaches are supposed to touch when they are completely risen. Now some of our guys did, and others didn't. We think this is because I had them too far spread out on the pan. This time we have made them a little cozier with their neighbors. The next batch is rising so keep your fingers crossed.

First Batch is in the Oven!!!

Puffy the Kolache Slayer

Filling is too thin! Damn.

Steusel sprinkle on top and in the oven!

The Dough Has Risen!!!

More than doubled, I'd say.

They will rise again!

Now We Wait...

The kolache dough has once again climbed up into the mechanisms of my mixer. I have gotten it scraped out the best that I could, so hopefully the whole thing is not ruined.

The dough is now taking its first rest. Jon has been acting as Quality Control (QC) tasting here and there, making sure there are no more measurement goofs.

We have decided to try to utilize some of that extra yeast that got removed to make some of the Crusty Artisan Bread from last week. We have something like 6 loaves going right now. I know, we are crazy.

Here are some action shots of how things are going to whet your appetite.

Don't kill the whisk!

Don't kill my whole machine!

Off To A Rough Start

We are only 1.25 hours in and we have had one serious mishap and one heated argument. This is going to be a looooonnnnngggg day.

(Misread tablespoon for teaspoon and put 6 Tablespoons of yeast in instead of teaspoons. We fished a lot out and are hoping for the best.)

We are still adding flour at this point. More to come...

Friday, June 10, 2011

Preparation...I've Moved Up a Stage

Bring it you delightful confection...I'm ready.


I'm going to need some moral support here people! Let me hear it!


Kolache Intimidation, Contemplation, and Other Technical Difficulties

Back in the late 1970's and early 1980's,  James Prochaska and Carlo DiClemente developed The Stages of Change Model as a way to describe the process smokers go through in trying to quit. Why do I bring this up? While working to improve the blog for you guys, I made a realization: It has been over a year since I have attempted to make a batch of kolaches. A year since I have attempted to master what this blog's name was all about. It got me thinking. Why have I not tried to make these in so long? I have all these new gadgets to help, 3 pages of notes from my kolache lesson with a little old Czech lady, what am I missing? This is what has turned me back around to these stages of change. Many of you have probably heard of these stages, but here is a quick brief for the rest of you, and how they fit in relation to my problem behavior of avoiding making kolaches.

Stage I: Precontemplation (Not yet acknowledging that there is a problem behavior that needs to be changed.)
  • "Kolaches?! Who wants those things? No one. So what if I don't make them, get off my back, will ya?"
Stage 2: Contemplation (Acknowledging that there is a problem but not yet ready or sure of wanting to make a change.)
  • "Okay, so it's been a year since I've baked them, but you know, I'm busy and tired. I mean, we can always get them from the store when we visit Jon's parents if we needed some anyway."
Stage 3: Preparation/Determination (Getting ready to change)
  • "I think I really need to make some kolaches, lest I forget everything I learned during Kolache lesson 101....over a YEAR AGO!!! Holy Fishsticks, it's been that long!?!!

Stage 4: Action/Willpower (Changing the behavior)
  • I am going to make some kolaches! This very weekend!

Stage 5: Maintenance (Maintaining the behavior change)
  • Big family get together coming up! Time to make more kolaches!

Stage 6: Relapse (Returning to older behaviors and abandoning the new changes)
  • Screw this, I'm not baking anymore. Ever.
Now not everyone relapses, some people relapse and then re-enter the cycle. As far as I can tell, I'm sitting between Contemplation and Preparation, and here's why.

Kolaches are...well...my nemesis. They are not merely a pastry that can be whipped up in a batch of a dozen or so. They are usually made in batches of 6-10 dozen at a time. They are a labor of love that take an entire day of coddling to make perfectly. It is exhausting and your back is killing you by the time you are done making them. You also need a giant bowl to make them in, and I am concerned that I still don't own a bowl big enough to contain all the dough. Okay, you're right, I'm still making excuses. I have just had so many fails when it comes to kolaches that I don't know if I can stomach one more.

And let me tell you another thing, the good bakers don't write their recipes down. When I went to the Kolache Master's house, she told me to use 10 sifters full of flour. Not cups, no units, not spoonfuls. A sifter full is not a unit of measurement. Why 10 sifters full of flour? Because that was just how many would fit into her stand mixer. Well, what if my stand mixer is not as big as hers? Then what? The whole mess will be off then and I'd have another disaster on my hands like this, this, this, and let's not forget this.

Will I ever get this right?

I can't even get photograph them properly!


... *sigh* ...


What would Julia think if she heard this? She would be abhorred. "You have to be fearless!!!" she would chirp. She's right, you know. I could spend the rest of life being afraid of these things, or I could say, "What the hell!" and keep on trying. I'm still wavering between Contemplation and Preparation, but now I'm making plans to go purchase what I need: 10 lbs. of flour, 4 dozen eggs, a gallon of cream and 45 lbs of butter. Maybe if I can find my balls tomorrow I will get started, long as I am up by 4 a.m., I should have enough time to finish. Wish me luck.

Thursday, June 9, 2011

Rainbow Cupcakes or Tie Dye Cupcakes, You Decide

The Rainbow Cake has been such a big hit on the blog, Facebook, and the office that I've decided to make a shortcut version for y'all that don't have hours to build a 6 layer cake. This one I made in cupcake form, but you can translate it into a single layer or double layer cake if you choose. I made these for a company meeting we have to go to today, and was able to whip them out (with baking time) in a little over an hour. The ingredients are almost the same as the Rainbow Cake:

• 1 – Box of cake mix in vanilla, white, or French vanilla flavors. (The cake base has to be white so if you see another boxed variety that would normally produce a white cake on completion, by all means go for it and tell me how it works out for you.)

• Whatever ingredients your cake mix says it needs to be made (usually eggs, oil, and water.)

• Muffin cups

• Gel food coloring in blue, red, yellow minimum. Splurge for more colors as your budget allows. Gel works better than the cheap kind that you dye Easter eggs with. You will use less dye, and the colors will be more vibrant.

• 1-2 tubs of icing. I chose white butter cream, but you can pick any flavor.

• 1 - Muffin pan (I had two muffin tins from a previous debacle, so I was able to cook all my cupcakes at once.)

• 6 bowls and spoons to mixing the colors in. Cereal bowls work just fine.

First things first, you need to make your cake batter according to the box's instructions. When it is nicely mixed, separate it equally into your six bowls. You can measure if you have OCD, or you can eyeball it like I did.

Once your batter is separated, add each color dye to its appropriate bowl. If you forgot/don't know how to make certain colors, read the Rainbow Cake post linked above.

Batter up!

Add your muffin cups to the tins and preheat your oven.

Now, we are going to add the colors. If you want red on the bottom, you will add the colors in this order: Red -> Orange -> Yellow -> Green -> Blue -> Purple.  If you want purple on the bottom, reverse that order. I put purple on the bottom because I added too much blue to mix and my purple came out ugly. Oh well.

Add a little of the first batter into the bottom of each cup. Just a spoonful or so. You only want the muffin cups 2/3rds of the way full once ALL the colors are added. Plus you may run out of particular batter color if you are overzealous like me. Only 21 of my 24 cupcakes got purple bottoms because I was too generous at the beginning. Start spooning in a small and add more after all 24 have a little of that first color.

If you want neater layers. Tap/shake the pan a couple of times between layers to help the batter settle flatter. You will also have to be more gentle when spooning in the layers so that the force of your plop doesn't send the newest color careening towards the bottom of the pan. If you want a more rainbow tie die effect, just plop and go, maybe just poke a toothpick in a few times. Don't over do it or they will all turn out 1 color. Now, if you are wanting those Polly Perfect rainbow layers, you might as well make the Rainbow cake. In the baking process, the cupcake layers will mix a little in odd ways and there is really no stopping it. Let your OCD rest for a day and let nature do its thing.

Continue to build up your layers in order. Remember, start with a little of the color in each cup and go back an add more if you have left overs at the end of each color round.


Purple, blue, green.

All 6 colors. Got a little short on orange as you can see.
Once you have all the colors in the cups, give the pan a firm tap or two to settle the batter in the pan. DO NOT under any circumstances try to swirl the colors with a knife or toothpick. This will blend the colors and you will end up with a bluish brown cupcake mess. If you wanted that, you should have just baked chocolate cupcakes. You can now bake the cupcakes as the box directs.


Weird blue dots on the left. Pretty nonetheless.
Wait until the cupcakes are completely cool before you ice them. Then they are ready to enjoy!

Little Cuties!
Tie dye on one hand, rainbow on the other. Delicious just the same.

Wednesday, June 8, 2011

Wednesday Wisdom From Julia

"The only real stumbling block is fear of failure. In cooking you've got to have a what-the-hell attitude."

True talk Julia, true talk.

Tuesday, June 7, 2011

Technique Tuesday: Making Roses from Gumdrops

Today, I'm going to show you how to make fancy gumdrop flowers to decorate a cake or cupcake with. Certainly, easier than an icing flower, these beauties have an extra sparkle that will add a bit of drama to a plain looking cake.

                                                               (c) Real Simple
 First things first, you will need the following:
  • A bag of gum drops. Each flower requires 3 gumdrops, so buy appropriate to your needs.
  • Sugar
  • Knife
  • Optional: rolling pin if you have one. If not, no big deal.
Sprinkle your work surface with a good bit of granulated sugar. Pull out your 3 gumdrops and use your rolling pin or the heel of your hand to smash to the gumdrop into a thin, 1/8" or so flatish disk. If it sticks to your hand or the pin, sprinkle more sugar on the drop.


Hulk Smash!
Next, you need to cut the disks in half, no big deal, don't freak out.

Aww..snap! Cut like a gansta!
Okay, the next part is kind of tricky so pay attention. Take your ugliest cutting and roll it up really tightly on itself. This will make the interior part of the bud. The heat of your hands will start to melt the drops a little, so sugar up as necessary. Pinch the bottom of the bud to secure the roll in place.

Use the remaining half-circles to continually wrap around the interior bud, pinching the bottoms together as you go. Try to overlap the seams so that they aren't all on the same side. It's not a lot of work and you get this really pretty little decoration.


Awwww

Just keep repeating the steps until you get as many as you need. Remember this is a garnish, so you don't have to make 900 of them, just a few for the center. They are very dense, everyone is not going to want to chew on one of these, probably only the kids. You want the cake to be the star, not the flowers.

Right before you are ready to put them on your cake you are going to need to cut the pinchy bit at the bottom off so that it will sit flat on your cake. We are going to chop that off.


Chop off the pinchy bit.
 Then you're ready to decorate with these little guys. Enjoy!